> ## Documentation Index
> Fetch the complete documentation index at: https://invopop-singapore.mintlify.site/llms.txt
> Use this file to discover all available pages before exploring further.
# Smart Receipts Guide
> Issue e-receipts in Italy
## Introduction
Invopop's Smart Receipts provider allows you to generate and issue electronic tickets (documento commerciale/scontrino elettronico) in Italy.
The *documento commerciale* is a digital fiscal document that records sales transactions and transmits them to the *Agenzia delle Entrate* (AdE). This digital receipt replaces traditional paper receipts while maintaining full fiscal compliance and serves as official proof of purchase for your customers.
Italian law requires businesses to transmit sales data digitally through either a certified Registratore Telematico (RT) or the [AdE's online portal](https://www.agenziaentrate.gov.it/portale/aree-tematiche/fatturazione-elettronica). Smart Receipts streamlines this process by providing a secure interface to relay your sales data to the AdE through a local provider.
Important distinctions for the *Documento Commerciale*:
* It is not an invoice (fattura) - invoices require detailed buyer information and follow different tax rules.
* It does not replace transport documents (documento di trasporto).
* It is not a simple internal receipt - it serves an official fiscal function requiring AdE transmission.
* It must include VAT at the time of sale - deferred VAT payment is not permitted.
The AdE portal provides functionality to create tickets, void them entirely, and process refunds at the item level. Invopop's Smart Receipts implementation supports all these operations, allowing you to manage your electronic tickets programmatically through our API or manually via the Console.
The AdE portal provides functionality to create tickets, void them entirely, and process refunds at the item level. Invopop's Smart Receipts implementation supports all these operations, allowing you to manage your electronic tickets programmatically through our API or manually via the Console.
## Prerequisites
Before you begin, ensure you have:
* An Italian tax ID (Partita IVA) for the supplier.
* Invoice line items that include:
* quantity,
* name ,
* price (including VAT),
* VAT rate,
* item type (specified in extension).
## Setup
There are five key processes to prepare:
1. Create a supplier post-registration workflow.
2. Connect the Italian Smart Receipts app.
3. Configure a supplier registration workflow.
4. Prepare an invoicing workflow.
5. Prepare a voiding workflow.
These instructions work in both sandbox and live environments. The only differences are in supplier data and registration details when using test environments.
Follow these steps in the [Invopop Console](https://console.invopop.com).
This workflow marks Suppliers as `Registered`. You will select this workflow in the Italian Smart Receipts app configuration later.
Copy and paste into a new [Empty Party workflow](https://console.invopop.com/redirect/workflows/new?template=empty-party) code view.
```json Example SDI post-registration workflow with states theme={"system"}
{
"name": "SDI supplier post-registration",
"description": "Marks supplier as 'registered'",
"schema": "bill/invoice",
"steps": [
{
"id": "7e8d8070-3870-11ef-af29-4533d56cea03",
"name": "Set State",
"config": {
"state": "registered"
},
"summary": "Set state to `registered`{.state .registered}",
"provider": "silo.state"
}
]
}
```
Before starting, review the [workflows guide](/guides/features/workflows) to understand the general setup process.
In [Console](https://console.invopop.com), create a new workflow and choose [Empty Party workflow](https://console.invopop.com/redirect/workflows/new?template=empty-party) as the base. Then name the workflow with a descriptive label such as "Smart Receipt Post-registration".
This worfkow is composed by a single step:
1. **Set State** - To `Registered`.
Though you can customize it to suit your needs (adding a webhook, or an email notification after a supplier has been registered.)
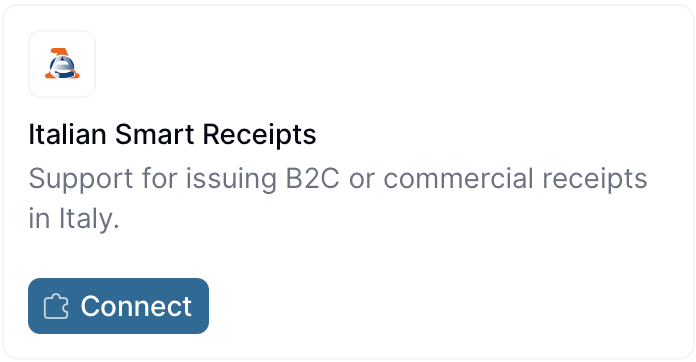
1. Navigate to **Configuration** → **Apps**.
2. Find **Italian Smart Receipts** in the app discovery list.
3. Click **Connect** to activate.
 Click the **Configure** button on the app, and choose the "Post-registration workflow" we created in the previous step.
Click the **Save** button.
This workflow will issue a registration request for a supplier to complete in order to issue receipts through SDI.
Copy and paste into a new [Empty Party workflow](https://console.invopop.com/redirect/workflows/new?template=empty-party) code view.
```json Example Smart Receipts register supplier workflow with states theme={"system"}
{
"name": "Smart Receipts register supplier",
"description": "Registers a supplier on AdE",
"schema": "org/party",
"steps": [
{
"id": "1a1be400-2b32-11f0-984e-0542d5f28f0b",
"name": "Sign Envelope",
"provider": "silo.close"
},
{
"id": "de116bb0-25b4-11f0-864a-193f213df097",
"name": "Register a supplier for AdE",
"provider": "ticket-it.register"
},
{
"id": "e0a1b380-25b4-11f0-864a-193f213df097",
"name": "Set State",
"provider": "silo.state",
"summary": "Set state to `processing`{.state .processing}",
"config": {
"state": "processing"
}
}
],
"rescue": [
{
"id": "1deb1470-2b32-11f0-984e-0542d5f28f0b",
"name": "Set State",
"provider": "silo.state",
"summary": "Set state to `error`{.state .error}",
"config": {
"state": "error"
}
}
]
}
```
Before starting, review the [workflows guide](/guides/features/workflows) to understand the general setup process.
In [Console](https://console.invopop.com), create a new workflow and choose [Empty Party workflow](https://console.invopop.com/redirect/workflows/new?template=empty-party) as the base. Then name the workflow with a descriptive label such as "SDI Register Supplier".
The new workflow will need to perform three steps:
* **Sign the Envelope**
* **Register the Issuer**
* **Set State** - with configuration set to `processing`.
Add any additional steps you may need, and save the new workflow.
This workflow will issue a Smart Receipt through Italy's AdE.
Copy and paste into a new [Empty Invoice workflow](https://console.invopop.com/redirect/workflows/new?template=empty-invoice) code view.
```json Example Smart Receipts issue receipt workflow with states theme={"system"}
{
"name": "Smart Receipts issue receipt",
"description": "Issue an Italian documento commerciale",
"schema": "bill/invoice",
"steps": [
{
"id": "0b0bdb00-25b5-11f0-864a-193f213df097",
"name": "Sign Envelope",
"provider": "silo.close"
},
{
"id": "04427d60-25b5-11f0-864a-193f213df097",
"name": "Send a receipt to AdE",
"provider": "ticket-it.send"
},
{
"id": "9e973e00-2b2d-11f0-984e-0542d5f28f0b",
"name": "Generate PDF",
"provider": "pdf",
"summary": "Italian - A4",
"config": {
"logo_height": 40,
"locale": "it",
"date_format": "%Y-%m-%d",
"layout": "A4"
}
},
{
"id": "112326b0-25b5-11f0-864a-193f213df097",
"name": "Set State",
"provider": "silo.state",
"summary": "Set state to `sent`{.state .sent}",
"config": {
"state": "sent"
}
}
],
"rescue": [
{
"id": "194a66a0-25b5-11f0-864a-193f213df097",
"name": "Set State",
"provider": "silo.state",
"summary": "Set state to `error`{.state .error}",
"config": {
"state": "error"
}
}
]
}
```
Before starting, review the [workflows guide](/guides/features/workflows) to understand the general setup process.
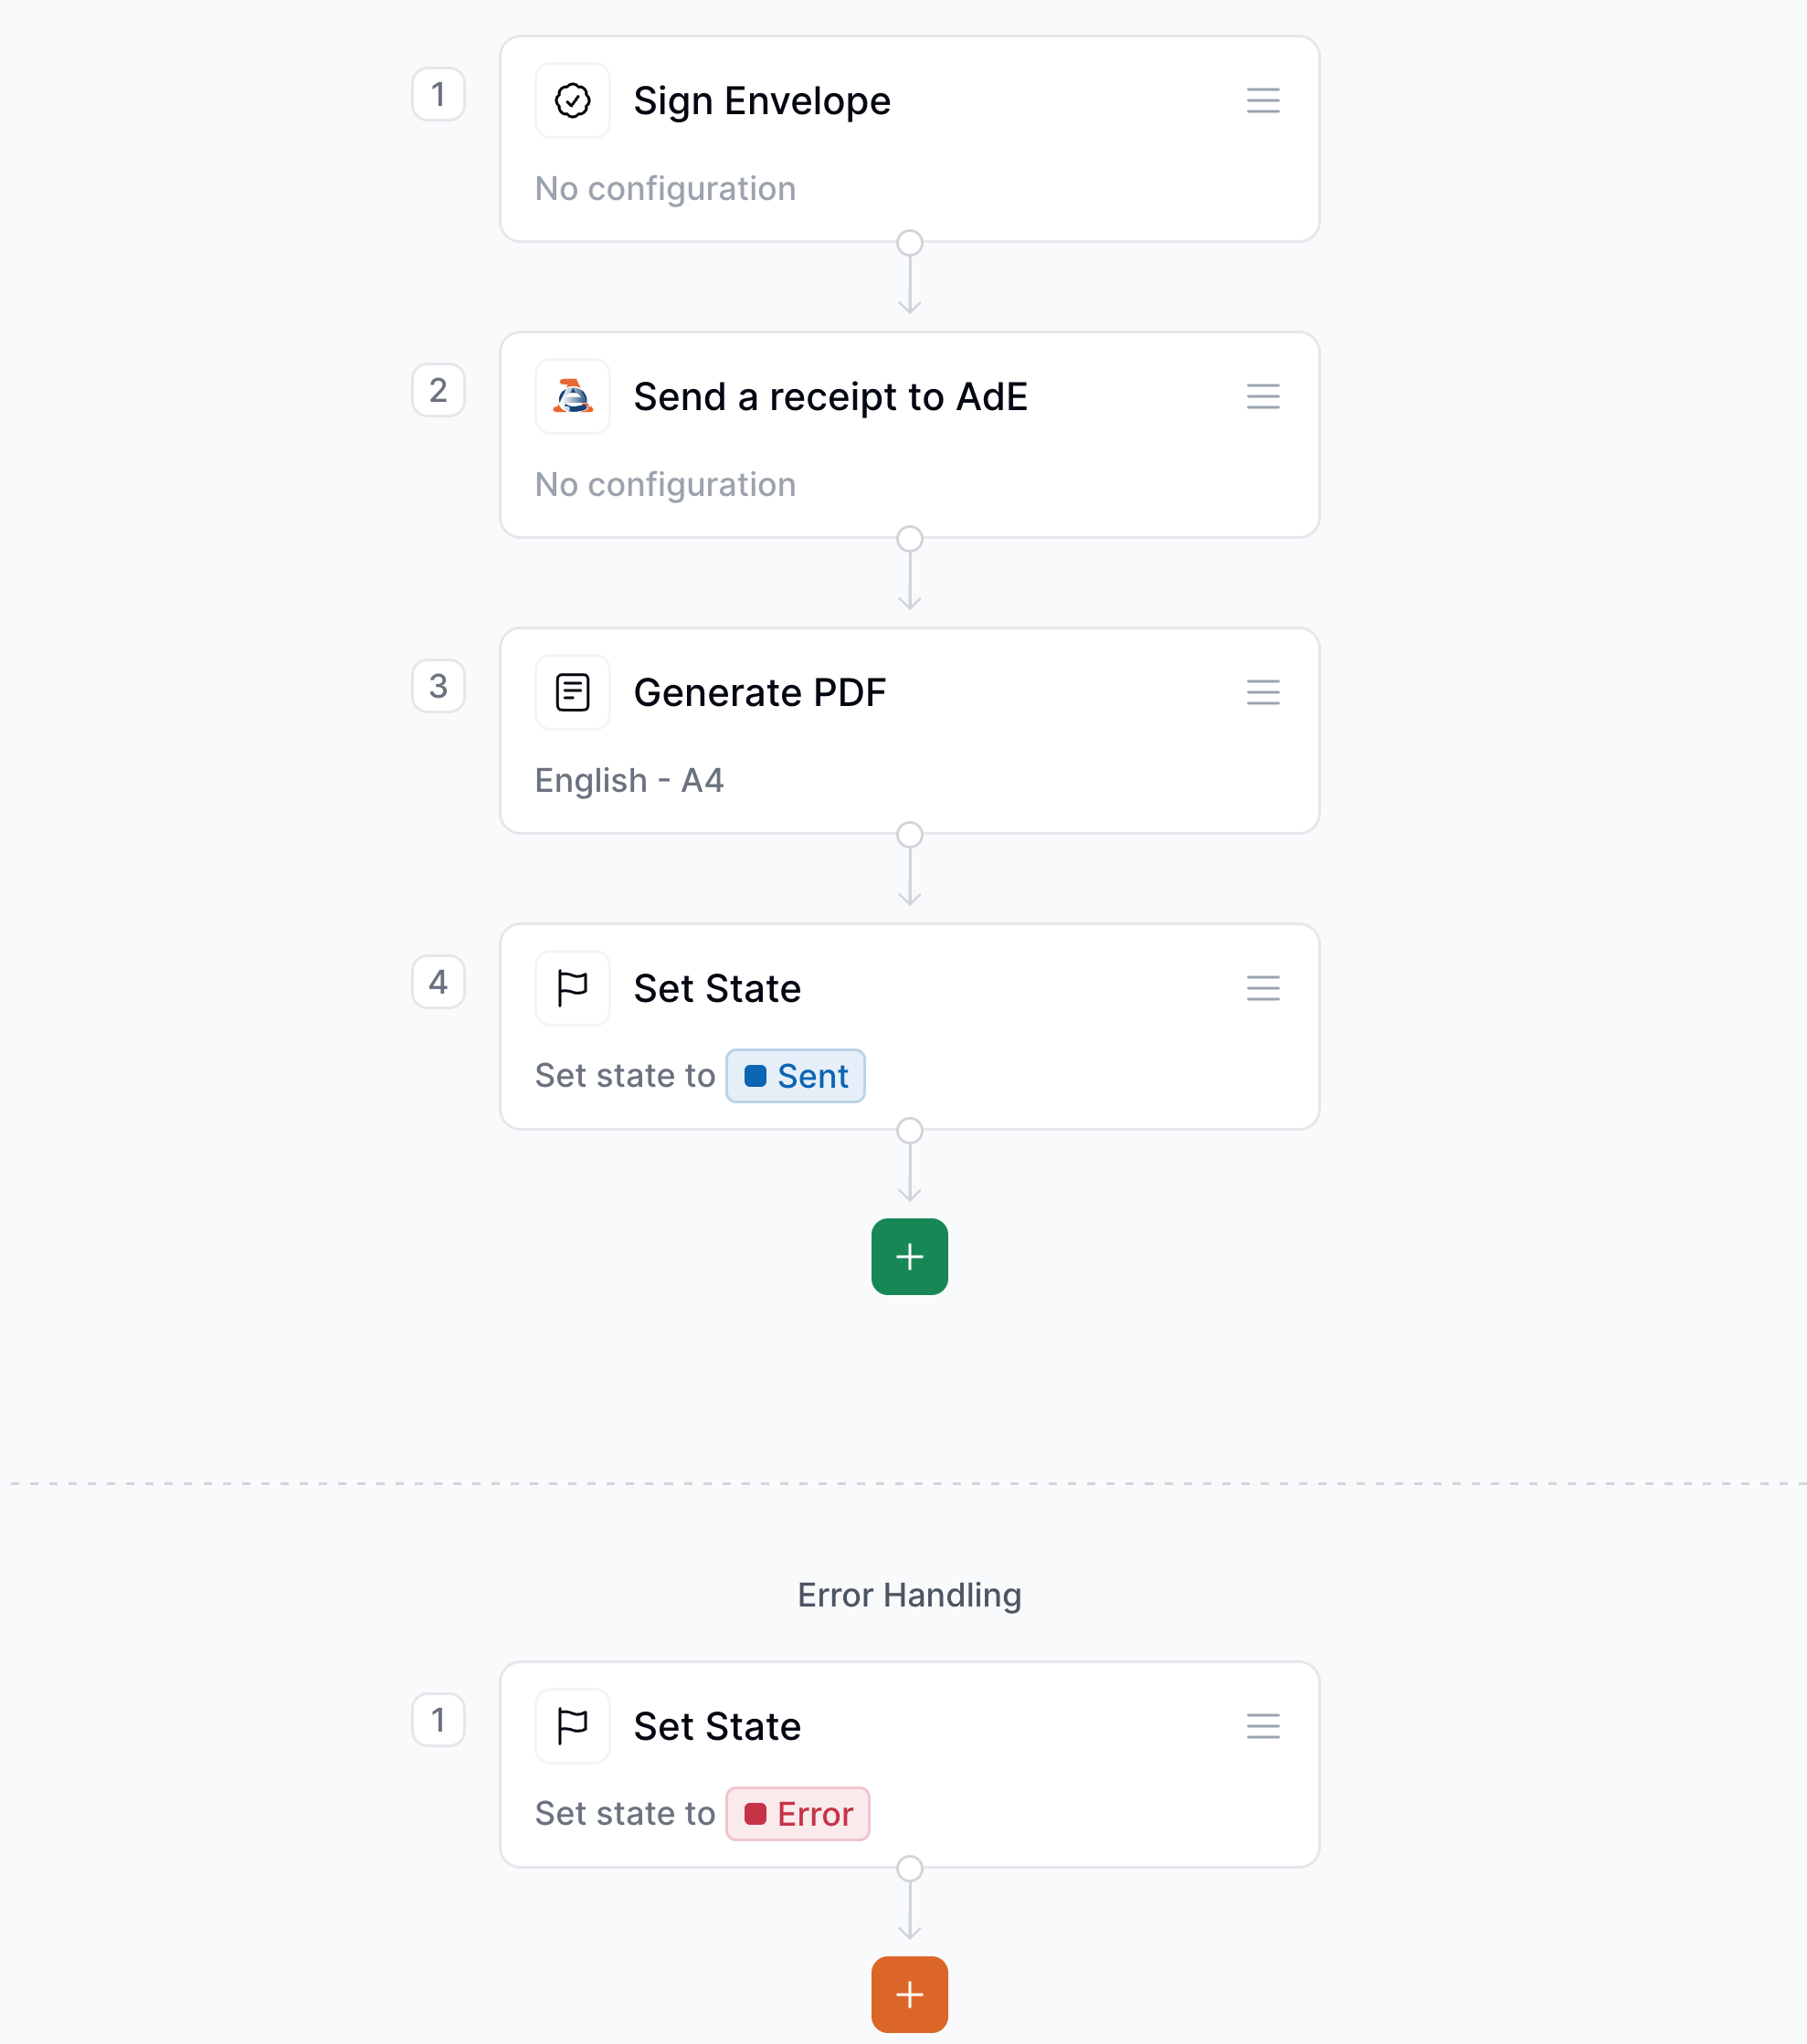
In [Console](https://console.invopop.com), create a new workflow and choose [Empty Invoice workflow](https://console.invopop.com/redirect/workflows/new?template=empty-invoice) as the base. Then name the workflow with a descriptive label such as "Issue Italian Smart Receipts".
The new workflow will need to perform three steps:
* **Add Sequential Code** - with dynamic sequences, and name like "Italian Smart Receipts".
* **Send a receipt to AdE**.
* **Generate PDF** - configured for your environment.
* **Set State** - to `sent`.
Finally, in the Error Handling area, add the **Set State** action and select `Error`.
Add any additional steps you may need, and save the new workflow.
Click the **Configure** button on the app, and choose the "Post-registration workflow" we created in the previous step.
Click the **Save** button.
This workflow will issue a registration request for a supplier to complete in order to issue receipts through SDI.
Copy and paste into a new [Empty Party workflow](https://console.invopop.com/redirect/workflows/new?template=empty-party) code view.
```json Example Smart Receipts register supplier workflow with states theme={"system"}
{
"name": "Smart Receipts register supplier",
"description": "Registers a supplier on AdE",
"schema": "org/party",
"steps": [
{
"id": "1a1be400-2b32-11f0-984e-0542d5f28f0b",
"name": "Sign Envelope",
"provider": "silo.close"
},
{
"id": "de116bb0-25b4-11f0-864a-193f213df097",
"name": "Register a supplier for AdE",
"provider": "ticket-it.register"
},
{
"id": "e0a1b380-25b4-11f0-864a-193f213df097",
"name": "Set State",
"provider": "silo.state",
"summary": "Set state to `processing`{.state .processing}",
"config": {
"state": "processing"
}
}
],
"rescue": [
{
"id": "1deb1470-2b32-11f0-984e-0542d5f28f0b",
"name": "Set State",
"provider": "silo.state",
"summary": "Set state to `error`{.state .error}",
"config": {
"state": "error"
}
}
]
}
```
Before starting, review the [workflows guide](/guides/features/workflows) to understand the general setup process.
In [Console](https://console.invopop.com), create a new workflow and choose [Empty Party workflow](https://console.invopop.com/redirect/workflows/new?template=empty-party) as the base. Then name the workflow with a descriptive label such as "SDI Register Supplier".
The new workflow will need to perform three steps:
* **Sign the Envelope**
* **Register the Issuer**
* **Set State** - with configuration set to `processing`.
Add any additional steps you may need, and save the new workflow.
This workflow will issue a Smart Receipt through Italy's AdE.
Copy and paste into a new [Empty Invoice workflow](https://console.invopop.com/redirect/workflows/new?template=empty-invoice) code view.
```json Example Smart Receipts issue receipt workflow with states theme={"system"}
{
"name": "Smart Receipts issue receipt",
"description": "Issue an Italian documento commerciale",
"schema": "bill/invoice",
"steps": [
{
"id": "0b0bdb00-25b5-11f0-864a-193f213df097",
"name": "Sign Envelope",
"provider": "silo.close"
},
{
"id": "04427d60-25b5-11f0-864a-193f213df097",
"name": "Send a receipt to AdE",
"provider": "ticket-it.send"
},
{
"id": "9e973e00-2b2d-11f0-984e-0542d5f28f0b",
"name": "Generate PDF",
"provider": "pdf",
"summary": "Italian - A4",
"config": {
"logo_height": 40,
"locale": "it",
"date_format": "%Y-%m-%d",
"layout": "A4"
}
},
{
"id": "112326b0-25b5-11f0-864a-193f213df097",
"name": "Set State",
"provider": "silo.state",
"summary": "Set state to `sent`{.state .sent}",
"config": {
"state": "sent"
}
}
],
"rescue": [
{
"id": "194a66a0-25b5-11f0-864a-193f213df097",
"name": "Set State",
"provider": "silo.state",
"summary": "Set state to `error`{.state .error}",
"config": {
"state": "error"
}
}
]
}
```
Before starting, review the [workflows guide](/guides/features/workflows) to understand the general setup process.
In [Console](https://console.invopop.com), create a new workflow and choose [Empty Invoice workflow](https://console.invopop.com/redirect/workflows/new?template=empty-invoice) as the base. Then name the workflow with a descriptive label such as "Issue Italian Smart Receipts".
The new workflow will need to perform three steps:
* **Add Sequential Code** - with dynamic sequences, and name like "Italian Smart Receipts".
* **Send a receipt to AdE**.
* **Generate PDF** - configured for your environment.
* **Set State** - to `sent`.
Finally, in the Error Handling area, add the **Set State** action and select `Error`.
Add any additional steps you may need, and save the new workflow.
 This workflow will void Smart Receipts from the AdE.
Copy and paste into a new [Empty Invoice workflow](https://console.invopop.com/redirect/workflows/new?template=empty-invoice) code view.
```json Example Smart Receipts void receipt workflow with states theme={"system"}
{
"name": "Smart Receipts void receipt",
"description": "Voids an Italian 'documento commerciale'",
"schema": "bill/invoice",
"steps": [
{
"id": "02a62be0-2b2e-11f0-984e-0542d5f28f0b",
"name": "Void a receipt in AdE",
"provider": "ticket-it.void"
},
{
"id": "1583e220-2b2e-11f0-984e-0542d5f28f0b",
"name": "Set State",
"provider": "silo.state",
"summary": "Set state to `void`{.state .void}",
"config": {
"state": "void"
}
}
],
"rescue": [
{
"id": "25c98860-2b2e-11f0-984e-0542d5f28f0b",
"name": "Set State",
"provider": "silo.state",
"summary": "Set state to `error`{.state .error}",
"config": {
"state": "error"
}
}
]
}
```
Before starting, review the [workflows guide](/guides/features/workflows) to understand the general setup process.
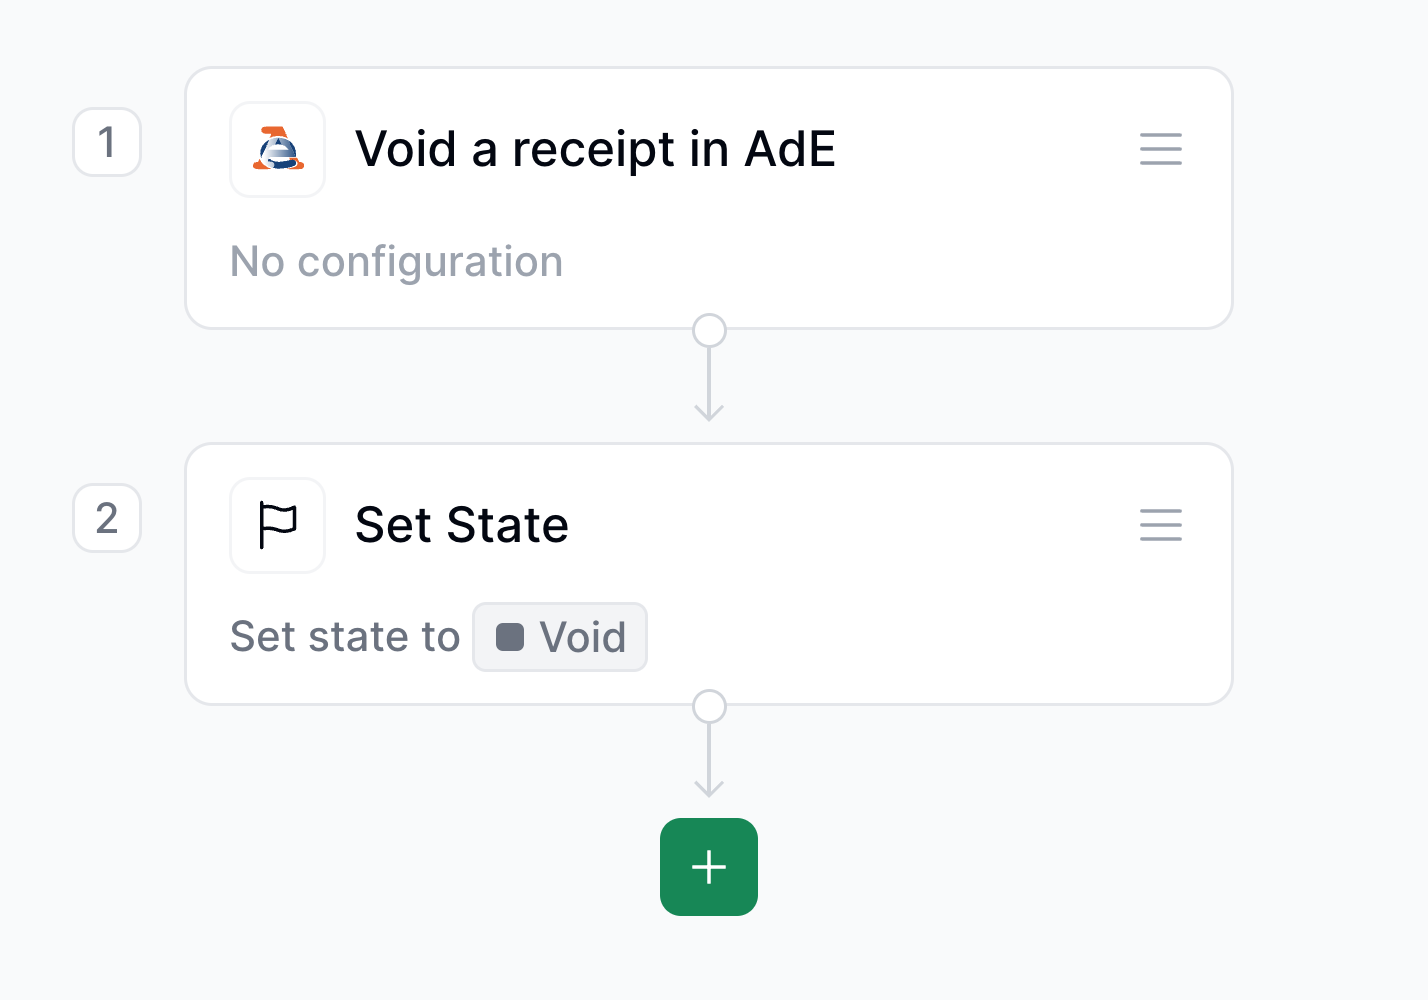
In [Console](https://console.invopop.com), create a new workflow and choose [Empty Invoice workflow](https://console.invopop.com/redirect/workflows/new?template=empty-invoice) as the base. Then name the workflow with a descriptive label such as "Void Italian Smart Receipts".
The new workflow will need to perform three steps:
* **Void a receipt in AdE**.
* **Set State** - to `sent`.
Finally, in the Error Handling area, add the **Set State** action and select `Error`.
Add any additional steps you may need, and save the new workflow.
This workflow will void Smart Receipts from the AdE.
Copy and paste into a new [Empty Invoice workflow](https://console.invopop.com/redirect/workflows/new?template=empty-invoice) code view.
```json Example Smart Receipts void receipt workflow with states theme={"system"}
{
"name": "Smart Receipts void receipt",
"description": "Voids an Italian 'documento commerciale'",
"schema": "bill/invoice",
"steps": [
{
"id": "02a62be0-2b2e-11f0-984e-0542d5f28f0b",
"name": "Void a receipt in AdE",
"provider": "ticket-it.void"
},
{
"id": "1583e220-2b2e-11f0-984e-0542d5f28f0b",
"name": "Set State",
"provider": "silo.state",
"summary": "Set state to `void`{.state .void}",
"config": {
"state": "void"
}
}
],
"rescue": [
{
"id": "25c98860-2b2e-11f0-984e-0542d5f28f0b",
"name": "Set State",
"provider": "silo.state",
"summary": "Set state to `error`{.state .error}",
"config": {
"state": "error"
}
}
]
}
```
Before starting, review the [workflows guide](/guides/features/workflows) to understand the general setup process.
In [Console](https://console.invopop.com), create a new workflow and choose [Empty Invoice workflow](https://console.invopop.com/redirect/workflows/new?template=empty-invoice) as the base. Then name the workflow with a descriptive label such as "Void Italian Smart Receipts".
The new workflow will need to perform three steps:
* **Void a receipt in AdE**.
* **Set State** - to `sent`.
Finally, in the Error Handling area, add the **Set State** action and select `Error`.
Add any additional steps you may need, and save the new workflow.
 ## Running
Each company who will issue e-receipts must first register as a supplier in Invopop. In this section we'll first explain how to register a supplier using the registration workflow we setup, and then how to issue and void invoices on behalf of that supplier, with the corresponding workflows.
As usual, the recommended approach for running jobs is to perform two steps; first upload the document to the [silo](/api-ref/silo/entries/create-an-entry-put), second [create a job](/api-ref/transform/jobs/create-a-job-put).
### Register a Supplier
You can register suppliers either manually via the Invopop Console or programmatically via the API. The process is essentially the same, so for this guide we'll demonstrate the manual process.
Suppliers in Italy using this system must generate and provide their [AdE](https://ivaservizi.agenziaentrate.gov.it/portale/)
credentials so that invoices can be processed on their behalf. This is not an automated service and can only be
performed manually by a representative of the supplier.
1. Navigate to **Contacts** → **Suppliers** in the sidebar
2. Click **+ New Supplier**
3. In the editor, enter the supplier details
Here's an example using test data (only valid for sandbox environments):
```json theme={"system"}
{
"$schema": "https://gobl.org/draft-0/org/party",
"uuid": "018fbeda-bc61-7000-b66d-398ce3e21c43",
"name": "Milano Pizza",
"tax_id": {
"country": "IT",
"code": "48220010093"
},
"identities": [
{
"key": "it-fiscal-code",
"code": "MRTMTT91D08F205J"
}
]
}
```
You may notice that we included the Italian fiscal code in the supplier, this is not necessary at the moment but will be asked for, if not provided, during the registration process.
Tap **Build**, ensure there are no errors, and click **Save**.
We should now see the document. Find and click the **Select Workflow** button. Select the **Register Supplier** workflow created during setup, and click **Run Workflow**.
The execution should be successful, and the silo entry will now be in the `Processing` state. Tap the **Meta** tab to see the registration link:
## Running
Each company who will issue e-receipts must first register as a supplier in Invopop. In this section we'll first explain how to register a supplier using the registration workflow we setup, and then how to issue and void invoices on behalf of that supplier, with the corresponding workflows.
As usual, the recommended approach for running jobs is to perform two steps; first upload the document to the [silo](/api-ref/silo/entries/create-an-entry-put), second [create a job](/api-ref/transform/jobs/create-a-job-put).
### Register a Supplier
You can register suppliers either manually via the Invopop Console or programmatically via the API. The process is essentially the same, so for this guide we'll demonstrate the manual process.
Suppliers in Italy using this system must generate and provide their [AdE](https://ivaservizi.agenziaentrate.gov.it/portale/)
credentials so that invoices can be processed on their behalf. This is not an automated service and can only be
performed manually by a representative of the supplier.
1. Navigate to **Contacts** → **Suppliers** in the sidebar
2. Click **+ New Supplier**
3. In the editor, enter the supplier details
Here's an example using test data (only valid for sandbox environments):
```json theme={"system"}
{
"$schema": "https://gobl.org/draft-0/org/party",
"uuid": "018fbeda-bc61-7000-b66d-398ce3e21c43",
"name": "Milano Pizza",
"tax_id": {
"country": "IT",
"code": "48220010093"
},
"identities": [
{
"key": "it-fiscal-code",
"code": "MRTMTT91D08F205J"
}
]
}
```
You may notice that we included the Italian fiscal code in the supplier, this is not necessary at the moment but will be asked for, if not provided, during the registration process.
Tap **Build**, ensure there are no errors, and click **Save**.
We should now see the document. Find and click the **Select Workflow** button. Select the **Register Supplier** workflow created during setup, and click **Run Workflow**.
The execution should be successful, and the silo entry will now be in the `Processing` state. Tap the **Meta** tab to see the registration link:
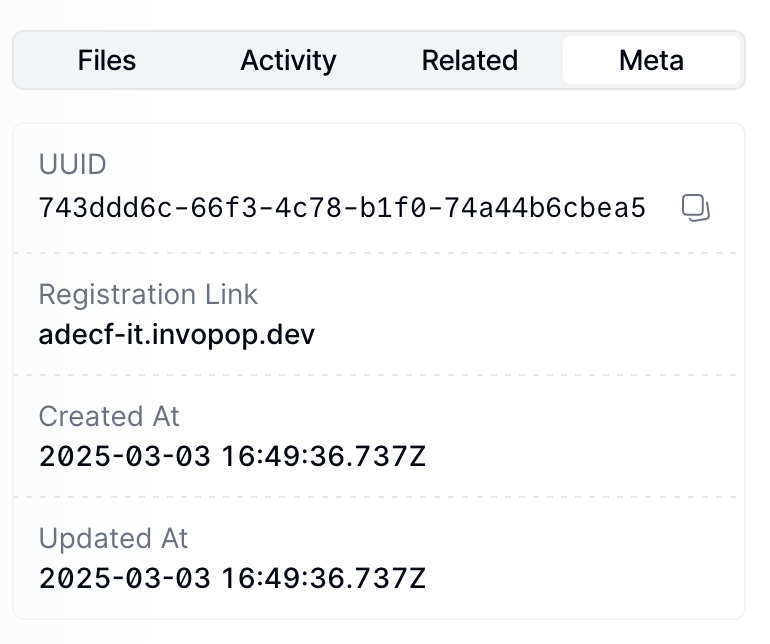 You can access the registration link via the API by [fetching the silo
entry](/api-ref/silo/entries/fetch-an-entry) and reading the `meta` row where
the `key` is set to `registration-link`.
Tap the registration link and a new browser window will be presented with a form to upload the credentials for the supplier. Note that this form can be shared directly with the supplier if required.
You can access the registration link via the API by [fetching the silo
entry](/api-ref/silo/entries/fetch-an-entry) and reading the `meta` row where
the `key` is set to `registration-link`.
Tap the registration link and a new browser window will be presented with a form to upload the credentials for the supplier. Note that this form can be shared directly with the supplier if required.
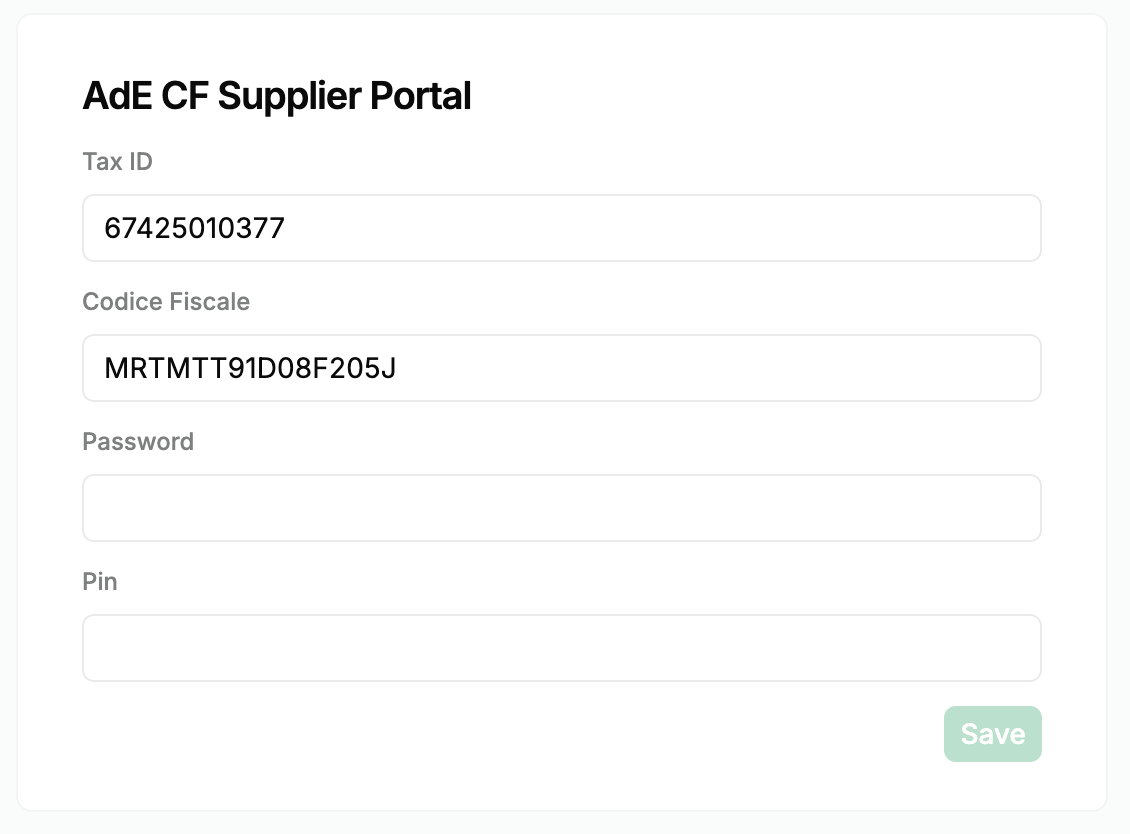 The details from this form are sent securely to local partner who will be responsible for sending them to the AdE.
We will update the supplier with the provided codice fiscale for future use but will not store any type of credentials.
These credentials will expire every 90 days. You must first update your credentials on the official AdE web portal, then enter these new credentials in our registration form. You can use the same registration link to update your credentials.
### Send an Invoice
Use these GOBL document examples as templates in the [Invopop Console](https://console.invopop.com) or when creating silo entries via the API.
For proper validation and normalization, set these properties in your GOBL Invoices:
* Set `$region` to [`IT`](https://docs.gobl.org/regimes/it)
* Include [`it-ticket-v1`](https://docs.gobl.org/addons/it-ticket-v1) in `$addons`
While Invopop attempts to set these automatically based on other invoice fields, we recommend defining them explicitly.
The example below shows a simple B2C invoice from an Italian supplier. Key points to note:
* The `it-ticket-v1` addon ensures validation using AdE CF V1 rules
* Extensions (`ext`) fields specify values that cannot be determined otherwise:
* Items have an extension identifying them as goods or services
* VAT exemptions require an Italian exemption code
* The `prices_include` field indicates that item prices include VAT
* VAT for "Cleaning Products" automatically sets to the standard rate
* Totals and calculations are generated automatically
```json theme={"system"}
{
"$schema": "https://gobl.org/draft-0/bill/invoice",
"$addons": ["it-ticket-v1"],
"series": "XXIT",
"code": "001",
"currency": "EUR",
"tax": {
"prices_include": "VAT"
},
"type": "standard",
"supplier": {
"name": "Cleaning SRL",
"tax_id": {
"country": "IT",
"code": "74230430451"
}
},
"lines": [
{
"quantity": "1",
"item": {
"name": "Cleaning services",
"price": "125.00",
"ext": {
"it-ticket-product": "services"
}
},
"taxes": [
{
"cat": "VAT",
"ext":{
"it-ticket-exempt": "N3"
}
}
]
},
{
"quantity": "3",
"item": {
"name": "Cleaning products",
"price": "137.50",
"ext": {
"it-ticket-product": "goods"
}
},
"taxes": [
{
"cat": "VAT",
"rate": "standard"
}
]
}
]
}
```
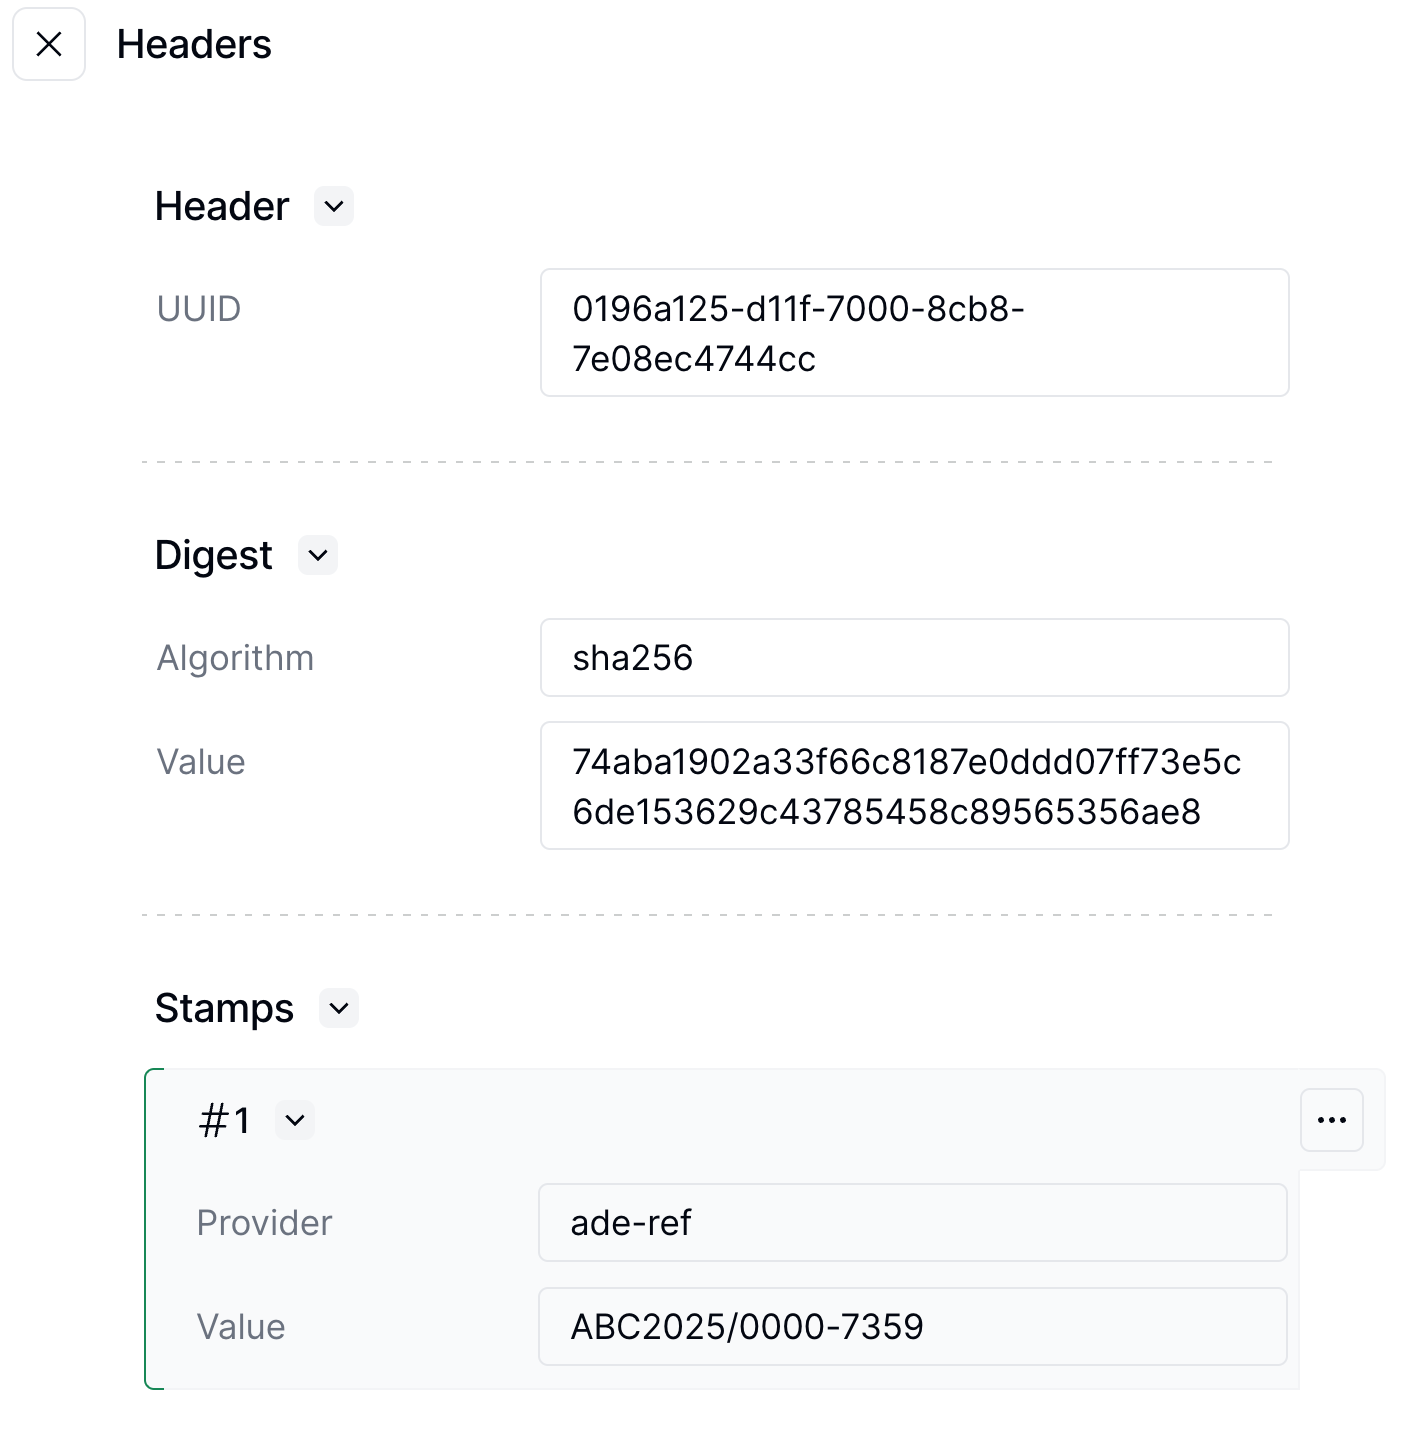
The AdE will automatically generate a document number for the invoice. Once the invoice is sent, you will find the document number in a stamp inside the document header.
The details from this form are sent securely to local partner who will be responsible for sending them to the AdE.
We will update the supplier with the provided codice fiscale for future use but will not store any type of credentials.
These credentials will expire every 90 days. You must first update your credentials on the official AdE web portal, then enter these new credentials in our registration form. You can use the same registration link to update your credentials.
### Send an Invoice
Use these GOBL document examples as templates in the [Invopop Console](https://console.invopop.com) or when creating silo entries via the API.
For proper validation and normalization, set these properties in your GOBL Invoices:
* Set `$region` to [`IT`](https://docs.gobl.org/regimes/it)
* Include [`it-ticket-v1`](https://docs.gobl.org/addons/it-ticket-v1) in `$addons`
While Invopop attempts to set these automatically based on other invoice fields, we recommend defining them explicitly.
The example below shows a simple B2C invoice from an Italian supplier. Key points to note:
* The `it-ticket-v1` addon ensures validation using AdE CF V1 rules
* Extensions (`ext`) fields specify values that cannot be determined otherwise:
* Items have an extension identifying them as goods or services
* VAT exemptions require an Italian exemption code
* The `prices_include` field indicates that item prices include VAT
* VAT for "Cleaning Products" automatically sets to the standard rate
* Totals and calculations are generated automatically
```json theme={"system"}
{
"$schema": "https://gobl.org/draft-0/bill/invoice",
"$addons": ["it-ticket-v1"],
"series": "XXIT",
"code": "001",
"currency": "EUR",
"tax": {
"prices_include": "VAT"
},
"type": "standard",
"supplier": {
"name": "Cleaning SRL",
"tax_id": {
"country": "IT",
"code": "74230430451"
}
},
"lines": [
{
"quantity": "1",
"item": {
"name": "Cleaning services",
"price": "125.00",
"ext": {
"it-ticket-product": "services"
}
},
"taxes": [
{
"cat": "VAT",
"ext":{
"it-ticket-exempt": "N3"
}
}
]
},
{
"quantity": "3",
"item": {
"name": "Cleaning products",
"price": "137.50",
"ext": {
"it-ticket-product": "goods"
}
},
"taxes": [
{
"cat": "VAT",
"rate": "standard"
}
]
}
]
}
```
The AdE will automatically generate a document number for the invoice. Once the invoice is sent, you will find the document number in a stamp inside the document header.
 After the AdE accepts the invoice, they add a reference to each line item. This reference, stored in the `it-ticket-line-ref` extension, is essential for processing refunds. The example below shows a complete invoice with these references.
```json theme={"system"}
{
"$schema": "https://gobl.org/draft-0/bill/invoice",
"$regime": "IT",
"$addons": [
"it-ticket-v1"
],
"uuid": "0196ed2c-3ca6-7000-b87f-8fb532b45250",
"type": "standard",
"series": "XXIT",
"code": "001",
"issue_date": "2025-05-20",
"currency": "EUR",
"tax": {
"prices_include": "VAT"
},
"supplier": {
"name": "Cleaning SRL",
"tax_id": {
"country": "IT",
"code": "74230430451"
}
},
"lines": [
{
"i": 1,
"quantity": "1",
"item": {
"name": "Cleaning services",
"price": "125.00",
"ext": {
"it-ticket-product": "services"
}
},
"sum": "125.00",
"taxes": [
{
"cat": "VAT",
"ext": {
"it-ticket-exempt": "N3"
}
}
],
"total": "125.00",
"ext": {
"it-ticket-line-ref": "557647"
}
},
{
"i": 2,
"quantity": "3",
"item": {
"name": "Cleaning products",
"price": "137.50",
"ext": {
"it-ticket-product": "goods"
}
},
"sum": "412.50",
"taxes": [
{
"cat": "VAT",
"rate": "standard",
"percent": "22.0%"
}
],
"total": "412.50",
"ext": {
"it-ticket-line-ref": "557647"
}
}
],
"totals": {
"sum": "537.50",
"tax_included": "74.39",
"total": "463.11",
"taxes": {
"categories": [
{
"code": "VAT",
"rates": [
{
"ext": {
"it-ticket-exempt": "N3"
},
"base": "125.00",
"amount": "0.00"
},
{
"key": "standard",
"base": "338.11",
"percent": "22.0%",
"amount": "74.39"
}
],
"amount": "74.39"
}
],
"sum": "74.39"
},
"tax": "74.39",
"total_with_tax": "537.50",
"payable": "537.50"
}
}
```
### Refund an Invoice
When a customer requests a refund for specific items, you can process it by issuing a corrective invoice. Since this is still considered sending an invoice, you can use the same workflow as before.
To create a corrective invoice take a original GOBL Invoice and:
1. Set the `type` field to `corrective`
2. Add a reference to the original invoice using the `preceeding` object
3. Include the original document number stamp from the first invoice
4. Keep the lines and quantities you want to refund
The example below shows a corrective invoice that refunds two units of "Cleaning Products" from the original invoice. The corrective invoice:
* Preserves the `it-ticket-line-ref` extension from the original invoice
* References the original invoice using the `preceeding` object
* Maintains the same line item references for accurate tracking
```json theme={"system"}
{
"$schema": "https://gobl.org/draft-0/bill/invoice",
"$regime": "IT",
"$addons": [
"it-ticket-v1"
],
"uuid": "0196ed40-b4ec-7001-a390-2b3a0b0fab58",
"type": "corrective",
"series": "REFUND",
"code": "001",
"issue_date": "2025-05-20",
"currency": "EUR",
"preceding": [
{
"uuid": "0196ed2c-3ca6-7000-b87f-8fb532b45250",
"type": "standard",
"issue_date": "2025-05-20",
"series": "XXIT",
"code": "001",
"stamps": [
{
"prv": "ade-ref",
"val": "ACUBE2025/0000-7816"
}
]
}
],
"tax": {
"prices_include": "VAT"
},
"supplier": {
"name": "Cleaning SRL",
"tax_id": {
"country": "IT",
"code": "74230430451"
}
},
"lines": [
{
"i": 1,
"quantity": "2",
"item": {
"name": "Cleaning products",
"price": "137.50",
"ext": {
"it-ticket-product": "goods"
}
},
"sum": "275.00",
"taxes": [
{
"cat": "VAT",
"rate": "standard",
"percent": "22.0%"
}
],
"total": "275.00",
"ext": {
"it-ticket-line-ref": "557647"
}
}
],
"totals": {
"sum": "275.00",
"tax_included": "49.59",
"total": "225.41",
"taxes": {
"categories": [
{
"code": "VAT",
"rates": [
{
"key": "standard",
"base": "225.41",
"percent": "22.0%",
"amount": "49.59"
}
],
"amount": "49.59"
}
],
"sum": "49.59"
},
"tax": "49.59",
"total_with_tax": "275.00",
"payable": "275.00"
}
}
```
### Void an Invoice
You can void an invoice if it was issued in error, such as when a receipt is accidentally sent twice. To void an invoice:
1. Locate the [silo entry uuid](/api-ref/silo/entries/fetch-an-entry) of the invoice
2. Run the "Void AdE CF Invoices" workflow with this uuid
You can only void invoices that were originally sent through this app during the same business day.
## FAQ
Please contact the [Invopop support team](email:support@invopop.com) if you have any questions that are not listed here.
AdE CF is **not** a substitute for [SDI](/guides/countries/it-sdi-sending). Invopop works with SDI to issue electronic invoices using the FatturaPA and is the main tool available to issue electronic invoices in Italy. AdE CF should only be used when customer information is not available, like in online B2C scenarios.
You cannot modify an AdE CF invoice after issuing it. Instead you must:
1. Void the incorrect invoice using the "Void AdE CF Invoices" workflow
2. Issue a new invoice with the correct information
We recommend adding a series and code to the invoice so that you can keep track internally even though the AdE will generate a document number.
After the AdE accepts the invoice, they add a reference to each line item. This reference, stored in the `it-ticket-line-ref` extension, is essential for processing refunds. The example below shows a complete invoice with these references.
```json theme={"system"}
{
"$schema": "https://gobl.org/draft-0/bill/invoice",
"$regime": "IT",
"$addons": [
"it-ticket-v1"
],
"uuid": "0196ed2c-3ca6-7000-b87f-8fb532b45250",
"type": "standard",
"series": "XXIT",
"code": "001",
"issue_date": "2025-05-20",
"currency": "EUR",
"tax": {
"prices_include": "VAT"
},
"supplier": {
"name": "Cleaning SRL",
"tax_id": {
"country": "IT",
"code": "74230430451"
}
},
"lines": [
{
"i": 1,
"quantity": "1",
"item": {
"name": "Cleaning services",
"price": "125.00",
"ext": {
"it-ticket-product": "services"
}
},
"sum": "125.00",
"taxes": [
{
"cat": "VAT",
"ext": {
"it-ticket-exempt": "N3"
}
}
],
"total": "125.00",
"ext": {
"it-ticket-line-ref": "557647"
}
},
{
"i": 2,
"quantity": "3",
"item": {
"name": "Cleaning products",
"price": "137.50",
"ext": {
"it-ticket-product": "goods"
}
},
"sum": "412.50",
"taxes": [
{
"cat": "VAT",
"rate": "standard",
"percent": "22.0%"
}
],
"total": "412.50",
"ext": {
"it-ticket-line-ref": "557647"
}
}
],
"totals": {
"sum": "537.50",
"tax_included": "74.39",
"total": "463.11",
"taxes": {
"categories": [
{
"code": "VAT",
"rates": [
{
"ext": {
"it-ticket-exempt": "N3"
},
"base": "125.00",
"amount": "0.00"
},
{
"key": "standard",
"base": "338.11",
"percent": "22.0%",
"amount": "74.39"
}
],
"amount": "74.39"
}
],
"sum": "74.39"
},
"tax": "74.39",
"total_with_tax": "537.50",
"payable": "537.50"
}
}
```
### Refund an Invoice
When a customer requests a refund for specific items, you can process it by issuing a corrective invoice. Since this is still considered sending an invoice, you can use the same workflow as before.
To create a corrective invoice take a original GOBL Invoice and:
1. Set the `type` field to `corrective`
2. Add a reference to the original invoice using the `preceeding` object
3. Include the original document number stamp from the first invoice
4. Keep the lines and quantities you want to refund
The example below shows a corrective invoice that refunds two units of "Cleaning Products" from the original invoice. The corrective invoice:
* Preserves the `it-ticket-line-ref` extension from the original invoice
* References the original invoice using the `preceeding` object
* Maintains the same line item references for accurate tracking
```json theme={"system"}
{
"$schema": "https://gobl.org/draft-0/bill/invoice",
"$regime": "IT",
"$addons": [
"it-ticket-v1"
],
"uuid": "0196ed40-b4ec-7001-a390-2b3a0b0fab58",
"type": "corrective",
"series": "REFUND",
"code": "001",
"issue_date": "2025-05-20",
"currency": "EUR",
"preceding": [
{
"uuid": "0196ed2c-3ca6-7000-b87f-8fb532b45250",
"type": "standard",
"issue_date": "2025-05-20",
"series": "XXIT",
"code": "001",
"stamps": [
{
"prv": "ade-ref",
"val": "ACUBE2025/0000-7816"
}
]
}
],
"tax": {
"prices_include": "VAT"
},
"supplier": {
"name": "Cleaning SRL",
"tax_id": {
"country": "IT",
"code": "74230430451"
}
},
"lines": [
{
"i": 1,
"quantity": "2",
"item": {
"name": "Cleaning products",
"price": "137.50",
"ext": {
"it-ticket-product": "goods"
}
},
"sum": "275.00",
"taxes": [
{
"cat": "VAT",
"rate": "standard",
"percent": "22.0%"
}
],
"total": "275.00",
"ext": {
"it-ticket-line-ref": "557647"
}
}
],
"totals": {
"sum": "275.00",
"tax_included": "49.59",
"total": "225.41",
"taxes": {
"categories": [
{
"code": "VAT",
"rates": [
{
"key": "standard",
"base": "225.41",
"percent": "22.0%",
"amount": "49.59"
}
],
"amount": "49.59"
}
],
"sum": "49.59"
},
"tax": "49.59",
"total_with_tax": "275.00",
"payable": "275.00"
}
}
```
### Void an Invoice
You can void an invoice if it was issued in error, such as when a receipt is accidentally sent twice. To void an invoice:
1. Locate the [silo entry uuid](/api-ref/silo/entries/fetch-an-entry) of the invoice
2. Run the "Void AdE CF Invoices" workflow with this uuid
You can only void invoices that were originally sent through this app during the same business day.
## FAQ
Please contact the [Invopop support team](email:support@invopop.com) if you have any questions that are not listed here.
AdE CF is **not** a substitute for [SDI](/guides/countries/it-sdi-sending). Invopop works with SDI to issue electronic invoices using the FatturaPA and is the main tool available to issue electronic invoices in Italy. AdE CF should only be used when customer information is not available, like in online B2C scenarios.
You cannot modify an AdE CF invoice after issuing it. Instead you must:
1. Void the incorrect invoice using the "Void AdE CF Invoices" workflow
2. Issue a new invoice with the correct information
We recommend adding a series and code to the invoice so that you can keep track internally even though the AdE will generate a document number.